
Blog
The prototype worked on the bench. It passed internal testing. The team felt good about the design. Then the project moved to DFM review, and the manufacturing engineer flagged six geometry issues that would require tool modifications. Verification testing on production-representative parts revealed a weld line failure mode that never appeared in the 3D-printed version. The first-article production run produced parts with sink marks on a critical sealing surface that the machined prototypes never hinted at.
These are not unusual scenarios. They are the default outcome when early-stage design decisions are made without visibility into how the device will actually be manufactured at scale. The prototype did not fail during prototyping. It failed months later, when the cost of fixing it had multiplied by an order of magnitude.
Most downstream prototype failures trace back to a small number of decisions made early in development: material selections driven by datasheet properties rather than processing behavior, tolerances tighter than the target process can sustain, geometry that works in additive manufacturing but cannot be injection molded, and test programs run on parts that are not representative of production. This article breaks down each of those failure patterns and what to do instead.
Why prototypes fail downstream, not during prototyping.
The fundamental problem is representation. Prototype-stage parts are almost always built with different processes, different materials, and different dimensional behavior than production parts. A prototype that “works” on the bench may be validating nothing about how the production device will perform.
3D-printed prototypes built with FDM, SLA, or SLS have fundamentally different mechanical properties, surface finishes, and failure modes than injection-molded or extruded production parts. Wall thickness uniformity in a printed part is determined by layer deposition. In an injection-molded part, it is determined by melt flow, pack pressure, cooling rate, and gate location. Weld lines, knit lines, gate vestige, fiber orientation effects, residual stress, and sink marks do not exist in a 3D print. They absolutely exist in molded parts, and they can be the difference between a part that passes functional testing and one that fractures under clinical load.
Consider a snap-fit latch on a molded housing. In an SLA prototype, the latch engages and disengages smoothly across 500 cycles. The team concludes the design is validated. But when the same geometry is injection molded in polycarbonate, the polymer flow creates a weld line at the base of the cantilever, exactly where the stress concentration is highest. Weld lines in PC can reduce tensile strength at that location by 30–50%, depending on fill pattern and processing conditions. The production part fails at 80 cycles. Nothing changed about the design. Everything changed about the material behavior introduced by the manufacturing process.
This pattern repeats across device categories. Extruded tubing prototyped by machining a tube from rod stock does not exhibit the same wall thickness distribution, residual stress profile, or flex fatigue behavior as tubing pulled through a die. Overmolded assemblies prototyped with adhesive bonding do not replicate the bond strength, interface geometry, or thermal effects of the actual overmold process.
The takeaway is not that prototyping is useless. It is that the team needs to be explicit about what each prototype is validating and what it is not. Every prototype has a fidelity gap relative to production. The failures happen when that gap is invisible or ignored.
| Dimension | 3D Print (FDM/SLA/SLS) | Injection Molding | Extrusion |
|---|---|---|---|
| Dimensional accuracy | ±0.005″ to ±0.010″ typical | ±0.001″ to ±0.005″ (process/geometry dependent) | OD ±0.0005″ to ±0.002″ with inline metrology |
| Material properties | Approximation only; layer adhesion limits strength | Full polymer performance; affected by flow, orientation, weld lines | Full polymer performance; affected by draw ratio, cooling rate |
| Weld line effects | None | Significant; 30–50% strength reduction at weld lines in some resins | N/A for single-lumen; multi-lumen introduces flow balancing variables |
| Surface finish | Layer lines (FDM), post-cure texture (SLA) | SPI Class A-1 to D-3; texture replicates from tool surface | Die-dependent; smooth to corrugated |
| Sink and void risk | None | Real; driven by wall thickness transitions, rib geometry, pack pressure | Real for thick-wall profiles; driven by cooling uniformity |
| Scalability to production | Zero (different process entirely) | Direct (same process, same tool) | Direct (same process, same die) |
The five early design decisions that create downstream failures.
1. Material selection without processing context.
Datasheet-driven material selection is one of the most common sources of downstream manufacturing problems. A resin that checks every box for biocompatibility, mechanical performance, and chemical resistance may have a narrow processing window, demanding handling requirements, or flow characteristics that make it difficult to mold or extrude consistently.
Nylon (PA6, PA12) is hygroscopic. If the material is not dried to specification before processing, moisture in the pellets flashes to steam during injection, producing splay on the part surface and compromising mechanical properties. The drying requirement is not difficult to meet, but it requires infrastructure, procedures, and process discipline that need to be planned for, not discovered during the first production run.
Pebax (PEBA) requires precise barrel temperature profiling because the material transitions from solid to melt over a narrow temperature range. Too cold and the melt front hesitates, creating flow marks. Too hot and the polymer degrades. An experienced extrusion house running Pebax daily understands the temperature map for a given durometer grade. A shop running it for the first time will burn through material and time learning what the experienced shop already knows.
TPU is shear-sensitive. At high injection speeds or through restrictive gates, the polymer can degrade, producing parts with reduced elongation and inconsistent durometer. The molding parameters that work for a TPU part are not the same as those for a comparable TPE, even if the datasheet properties look similar.
The fix is straightforward: involve a processing engineer during material selection. Before you commit to a resin, ask someone who runs that material in production what the processing considerations are. Material datasheets do not tell you how a resin behaves in a mold or through a die. Processing experience does.
A second axis that gets less attention: commercial and supply-chain constraints. Engineers can commit to a highly specialized resin early in development without realizing what that means operationally when production volumes are still low.
“I’ve seen resin minimum order quantities as high as 5,000 pounds. When you’re prototyping or doing early validation, that’s a serious economic problem. Engineers specify a highly specialized material based on the datasheet without realizing they’ve locked themselves into a sourcing constraint that will affect them for the next two years.”
— Ray Scherer, Engineering, Aptyx
Early involvement from a supplier or manufacturing partner on material availability, MOQ requirements, and sourcing strategy is not a procurement conversation — it is a development risk management conversation. It belongs in the same room as the material selection discussion, not after the design is frozen.
2. Tolerances specified without process capability in mind.
Tight tolerances cost money. Tolerances tighter than the process can sustain cost even more, because they produce scrap, require sorting, or force secondary operations.
Injection molding can typically hold ±0.001″ to ±0.005″ depending on part geometry, material shrinkage behavior, tooling class, and cavity count. The shrinkage behavior of a given resin matters significantly here, and it is more nuanced than it might appear.
Fiber-reinforced materials reduce overall shrinkage relative to their unfilled equivalents, but they introduce anisotropic shrink behavior driven by fiber orientation. Shrinkage rates vary parallel and transverse to fiber alignment, and because fiber orientation changes throughout complex part geometries, predicting dimensional behavior becomes considerably more complicated than a single shrinkage value would suggest. Unfilled amorphous resins, by contrast, are generally more isotropic and exhibit relatively uniform shrinkage throughout a part. Unfilled semi-crystalline resins typically exhibit substantially higher shrinkage than amorphous resins and may show moderate anisotropic behavior due to molecular and crystalline orientation effects during molding. A tolerance that is comfortably achievable in polycarbonate may require tooling modifications and process optimization in nylon 6/6 — and the reasons are not just about shrinkage magnitude but about how and where that shrinkage is distributed through the part.
Medical tubing extrusion can hold OD tolerances to ±0.0005″ with inline laser metrology and closed-loop control, but this level of capability requires specific equipment, calibrated measurement systems, and process controls that are not universal. Specifying ±0.0005″ on a print without confirming that your extrusion partner runs that level of capability creates a gap that will surface during first-article inspection. Another consideration is that you may not need tolerances so tight, which could make manufacturing less constrained and more efficient. You need to take into consideration how the entire device works and what interactions there may be.
The concept of process capability index (Cpk) is worth understanding here. A Cpk of 1.33 means the process is centered within the tolerance band with enough margin that fewer than 63 parts per million fall outside specification. A Cpk of 1.0 means approximately 2,700 ppm are out of spec. When you specify a tolerance on a drawing, you are implicitly requiring a certain Cpk to be achievable. If the process cannot deliver it, you will either reject parts or negotiate a tolerance change after tooling is cut.
The fix: ask your manufacturing partner what tolerances they can hold in sustained production for your material and geometry, and design to that capability. The conversation should happen before tooling investment, not after first-article results come back out of specification.
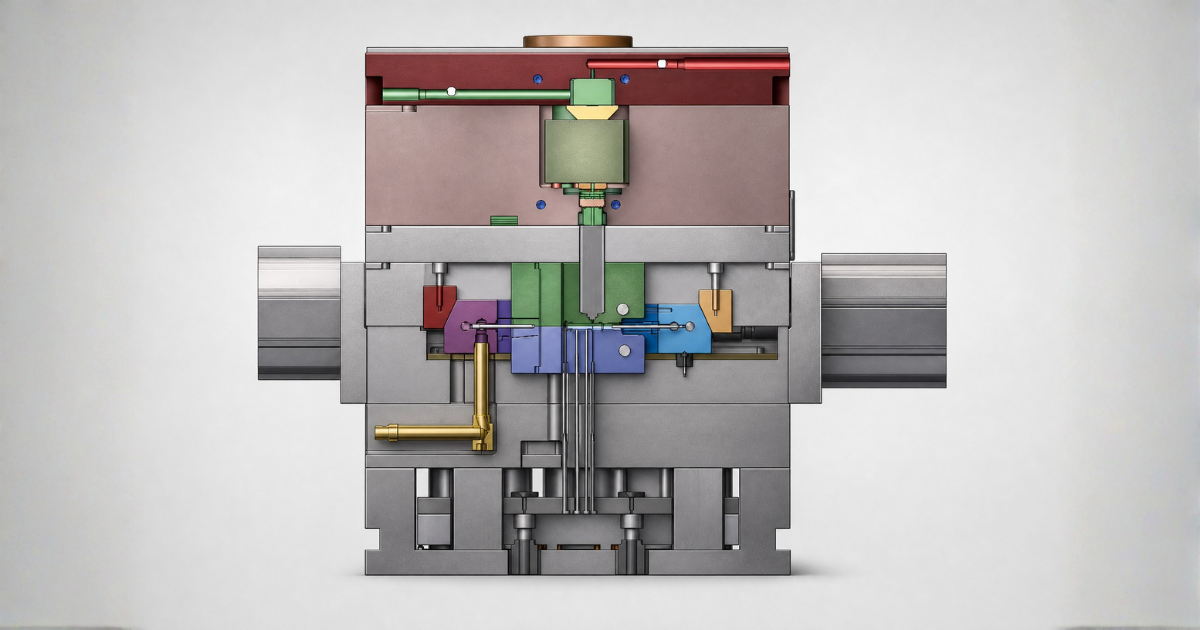
3. Part geometry that can’t be tooled or demolded.
CAD software does not flag features that are difficult or impossible to injection mold. Undercuts that require side actions or lifters, draft angles below 0.5° on textured surfaces (texture depth and draft are coupled), wall thickness transitions greater than 2:1 that create differential cooling and sink, thin ribs without adequate draft, and deep cores with insufficient venting are all common in designs built for function without consulting a mold designer.
Moldflow simulation can predict many of these issues before steel is cut. Fill analysis reveals hesitation, gas traps, and weld line locations. Pack analysis shows where sink and voids will form. Warp analysis predicts how the part will distort after ejection.
Warpage in particular deserves more attention than it typically receives. Most DFM conversations focus on weld lines, surface finish, and sink because those are the visible problems that surface early. Warpage is the more complex one, and it is frequently not addressed systematically.
“Most molders focus on weld lines, surface finish, and sink because those are the visible problems. Warpage is the harder one. With unfilled resins, you can often significantly reduce or even eliminate it through design, processing, and tooling adjustments. Fiber-filled materials are a different challenge entirely — anisotropic shrink behavior from fiber orientation means successful correction frequently requires tooling compensation and more advanced control of material flow and cooling.”
— Ray Scherer, Engineering, Aptyx
Running Moldflow on a critical part before committing to tool design is relatively inexpensive compared to the cost of modifying a hardened steel mold after first shots reveal problems. The fix: conduct a DFM review with a tooling engineer before finalizing the design for tooling. A focused session with someone who has designed and debugged hundreds of molds can identify issues that would otherwise surface as $20,000 to $80,000 engineering change orders after the tool is built. This review should cover draft, wall thickness uniformity, gate location options, ejection strategy, warpage risk, and any features that will require special tool actions.
4. Assembly sequences that work in the lab but not on a production line.
Prototypes are almost always assembled by the engineer who designed them. That engineer has tacit knowledge of insertion angles, alignment cues, force application, and orientation that exists nowhere in the design documentation. The prototype assembles perfectly because the person assembling it understands every nuance of the design intent.
Production assembly happens in a cleanroom, performed by trained operators following documented work instructions. If the device requires tweezers, magnification, or “feel” to assemble correctly, yield problems and quality escapes are inevitable at volume. Features that require precise rotational alignment without a keying feature, press fits that demand a specific insertion angle to avoid cocking, and bonding operations where adhesive placement is operator-dependent are all common sources of production yield loss.
Ultrasonic welding, spin welding, hot-plate welding, and solvent bonding each have their own joint design requirements. An ultrasonic weld joint needs an energy director with specific geometry and dimensions. A spin weld requires rotational symmetry. Designing these joint features into the part from the beginning is far less expensive than retrofitting them after the prototype phase has concluded.
The fix: design the assembly sequence alongside the part design. Document it early. If an experienced operator cannot assemble the device reliably using only written instructions and standard tooling after reasonable training, the assembly design needs revision.
5. Testing prototypes that don’t represent production.
Running verification and validation testing on prototypes that are not production-representative is one of the most expensive mistakes in medical device development, because it produces results that do not predict production performance. If the test passes, you have false confidence. If it fails, you may not know whether the failure is due to the design or the prototype fabrication method.
Functional testing on machined prototypes does not account for injection-molded weld lines, fiber orientation effects, or residual stress. Biocompatibility testing on a machined part from extruded rod stock may not reflect the surface chemistry of an injection-molded part processed with a different thermal history. Fatigue testing on a prototype built with a different crystallinity level than the production part will produce misleading cycle counts.
The gap between prototype and production is not just academic. It has regulatory implications. The FDA expects that verification and validation testing is performed on parts that are representative of the finished commercial device. Test data generated on parts built with fundamentally different processes may not be accepted as supporting evidence in a regulatory submission.
The fix: run critical functional tests on production-representative parts as early as feasible. Quick-turn tooling systems can produce injection-molded parts from production-equivalent materials in 2–4 weeks. For extruded components, short development runs on production-scale equipment can produce test samples with the right dimensional characteristics and material properties. The earlier you test on representative parts, the earlier you discover the failure modes that matter.
Sub-assembly validation: test the pieces before you test the system.
Complex medical devices are systems. A catheter-based delivery system might include a shaft assembly, a handle mechanism, a distal tip, and a deployment feature. An electromechanical surgical instrument might include a molded housing, a gear train, an end-effector mechanism, and an overmolded cable assembly.
Testing the integrated system before validating individual sub-assemblies is tempting because it feels like faster progress. It is actually slower, because when the integrated system fails, the failure could originate in any sub-assembly or in the interface between them. Debugging an integrated failure is ambiguous and time-consuming.
The better approach is decomposition. Break the device into functional sub-assemblies. Define the critical performance requirement for each one. Test each sub-assembly independently against its own acceptance criteria before integrating.
This approach catches tolerance stack-up issues, interface fit problems, and individual component failure modes early, when individual sub-assemblies are cheap to modify. It also produces cleaner test data, because each test isolates a specific variable rather than conflating multiple potential failure modes.
| Sub-assembly | Critical function | Test method | Prototype approach | Production-representative approach |
|---|---|---|---|---|
| Molded housing | Structural integrity, snap-fit retention | Load testing, cycle testing | SLA or SLS print | Quick-turn molded parts (e.g., Q-Drive) |
| Gear train | Torque transmission, backlash | Torque measurement, cycle life | Machined gears | Molded gears in production resin |
| Extruded shaft | Kink resistance, pushability, torque response | Bench flex testing, torque testing through fixturing | Machined tubing or short extrusion run | Development extrusion run with production die |
| Overmolded interface | Bond strength, seal integrity | Pull testing, pressure decay | Adhesive bonded mockup | Overmolded samples with production tooling |
| Distal tip / balloon | Deployment force, burst pressure, compliance | Pressure testing, deployment force measurement, elongation pull testing | Hand-built tip assemblies | Tip assemblies built with production processes |
After sub-assembly validation, the integration step becomes a test of interfaces and system-level behavior, not a test of everything at once. Problems found at integration are more likely to be interaction effects (tolerance stack-up, assembly sequence issues) rather than fundamental sub-assembly failures, making them faster to diagnose and resolve.
When to involve your manufacturing partner.
The conventional development sequence looks like this: design the device, build prototypes, test, finalize the design, find a manufacturer, conduct DFM review, modify the design to address manufacturability issues, rebuild prototypes, retest. This sequence is linear, and it builds in months of rework as a structural feature of the timeline.
The better sequence involves the manufacturing partner during design, so DFM happens concurrently with development rather than sequentially after it. The engineers who understand mold flow behavior, die design constraints, tolerance capability, and process limitations contribute to the design while it is still flexible. Changes at this stage are CAD revisions. Changes after tooling commitment are engineering change orders with five-figure price tags.
What early manufacturing involvement actually looks like:
- Design reviews with tooling and process engineers evaluating draft, wall thickness, gate location, and ejection strategy on critical parts before the design is released for tooling.
- Moldflow simulation on parts where fill balance, weld line location, or warp are concerns. This is a predictive tool, not a post-mortem tool. It should run before the mold is designed, not after first shots reveal problems.
- Material selection advisory based on processing experience with specific resins, not just published datasheet properties. A manufacturing partner that runs your target material every day can tell you things about its behavior — and its commercial constraints — that no datasheet captures.
- Tolerance analysis against demonstrated process Cpk data for your part geometry and material class, ensuring that every tolerance on the drawing is achievable in sustained production.
- Assembly process design input so that the device can be reliably assembled using documented procedures, standard tooling, and trained operators in a cleanroom environment.
There is a real tradeoff here. Early manufacturer involvement requires the manufacturing partner to invest engineering time in a project that may not reach production. Not every manufacturer will do this. The willingness to engage during development, before the production contract is certain, is a signal of a partner that is invested in the long-term relationship rather than just the purchase order. That alignment matters.
The prototype-to-production transition: what good looks like.
The transition from prototype to production is not a single event. It is a progressive shift in fidelity across materials, tooling, processes, and documentation. But fidelity is only part of the picture. A prototype strategy that produces accurate parts at low volume can still create serious quality and cost problems during scale-up if it was not designed with the eventual production solution in mind.
A common example: a part developed using an edge-gate configuration because it is simple and cost-effective for a prototype tool. At low volumes, it works fine. But high-volume production may ultimately require a direct-gating strategy to achieve the necessary cycle time, automation, cosmetic quality, or fill consistency. If that production requirement was not considered during the prototype phase, the scale-up introduces risk that was entirely avoidable.
“The first question we ask on any new program is: if this product is wildly successful, what is the highest annual production volume we could realistically expect? We do DFM around that long-term manufacturing solution and work backward to develop a prototype strategy that supports it. Prototype tooling is too often treated as an isolated phase rather than the first step on a scalable manufacturing roadmap. That disconnect creates unnecessary risk in both quality and cost as volumes increase.”
— Ray Scherer, Engineering, Aptyx
The closer your prototype phase gets to production-equivalent conditions — in both fidelity and downstream compatibility — the smoother the transition will be.
| Readiness dimension | Prototype phase | Production-ready |
|---|---|---|
| Materials | Surrogate or approximation (3D-print resin, machined stock) | Production-grade resin, lot-controlled, with material certification |
| Tolerances | Functional fit confirmed, tolerance sensitivity unknown | Tolerances validated against process Cpk; critical dimensions identified |
| Tooling | None (additive) or soft tooling | Production tooling (hardened steel, SPI class defined, cavity count finalized) |
| Assembly | Engineer-assembled, undocumented | Operator-assembled per documented work instructions; fixture-assisted |
| Testing | Functional bench testing on prototype-grade parts | V&V testing on production-representative parts with formal protocols |
| Documentation | Informal notes, CAD files | Controlled drawings (GD&T), BOM, assembly procedures, DHF |
| Quality system | None | ISO 13485 compliant; IQ/OQ/PQ completed on production equipment |
Production-equivalent prototypes carry weight beyond engineering confidence. Parts built with production tooling, production materials, and production processes are the strongest supporting evidence in a regulatory submission. The FDA expects that the test articles used in verification and validation testing are representative of the finished commercial device. Testing on production-equivalent parts is not just good engineering practice. It is a regulatory expectation.
The IQ/OQ/PQ validation sequence (Installation Qualification, Operational Qualification, Performance Qualification) is the formal process for demonstrating that manufacturing equipment and processes are installed correctly, operate within specified parameters, and consistently produce parts that meet requirements. The prototype phase should anticipate this validation by establishing the process parameters, acceptance criteria, and measurement methods that will carry forward into production qualification.
How Aptyx approaches early-stage development.
Aptyx’s development model is built around the principle that manufacturing engineering should inform device design, not react to it after the fact.
Every program is assigned a dedicated project engineer who owns the project from proposal through full production lifecycle. That engineer is not a project manager routing emails between departments. They are a technical resource with direct access to tooling, process, and quality engineering across Aptyx’s global network.
For injection-molded components, Aptyx runs Moldflow simulation and DFM analysis before committing to tool design. Fill balance, weld line location, sink prediction, warp analysis, and gate optimization all happen while the design is still flexible. The goal is to identify and resolve manufacturability issues in CAD, not in steel.
The Q-Drive quick-turn tooling system produces production-representative molded parts in 2–4 weeks. Q-Drive uses customer-owned inserts in a master mold base with Class 103 construction (54–56 HRC), approximately 250,000-shot life, and ±0.003″ capability. Parts produced on Q-Drive tooling are suitable for design verification, functional testing, and regulatory submissions. For teams that need to validate a molded component without waiting 12–16 weeks for production tooling, this compresses the timeline by months.
For extruded components, Aptyx operates 80+ extrusion lines with 35+ years of medical tubing experience across Pebax, TPU, PE, TPE, nylon, and other medical-grade polymers. Development extrusion runs can produce test samples with production-equivalent dimensional characteristics and material properties, enabling early functional testing on representative parts.
For complex catheter and delivery system programs, the Interventional Systems division in Charlotte provides development engineering with 20+ engineers and experience across 100+ programs. Development and manufacturing are co-located, which means the transition from prototype to pilot to production happens within a single organization, eliminating the handoff risk that comes with splitting development and manufacturing across separate partners.
Across all program types, the engineering approach is the same: get involved early, apply predictive tools to avoid rework, build production-representative prototypes as soon as feasible, and compress the path from design to validated, production-ready device.
If you are developing a medical device program and want engineering input on your prototype strategy, material selection, or DFM before committing to tooling, start the conversation with Aptyx engineering.
Frequently asked questions.
What is the most common reason medical device prototypes fail?
The most common cause is not a design flaw caught during prototyping. It is a manufacturing-related failure mode that does not appear until the design moves to production-representative parts or production tooling. Weld line failures, sink marks on sealing surfaces, tolerance drift in sustained molding, and assembly yield issues are all examples of problems that 3D-printed or machined prototypes cannot reveal. The root cause is typically a design decision made without input from a manufacturing process engineer.
When should I switch from 3D-printed prototypes to production-representative parts?
As soon as you are testing functional performance that depends on material properties, dimensional precision, or process-specific characteristics. Early concept validation and form-factor studies are appropriate for 3D-printed parts. Once you are testing mechanical performance, seal integrity, fatigue life, or any functional requirement that will appear in a verification protocol, you should be testing on parts made with production-equivalent processes and materials. Quick-turn tooling systems can produce injection-molded samples in 2–4 weeks, making this transition practical much earlier than many teams realize.
What is design for manufacturability (DFM) in medical devices?
DFM is the practice of designing a device so that it can be reliably and cost-effectively manufactured at production scale. In the context of polymer-based medical devices, this includes considerations like draft angles for mold ejection, uniform wall thickness to prevent sink and warp, gate location to minimize cosmetic and structural impact, tolerance specifications that align with process capability, and assembly features designed for operator-friendly production. DFM review should happen before tooling investment, ideally as a collaborative exercise between the design team and the manufacturing partner’s tooling and process engineers.
How tight can injection molding tolerances be for medical device parts?
General commercial tolerances for injection molding are typically ±0.003″ to ±0.005″. Fine tolerances of ±0.001″ to ±0.002″ are achievable with appropriate tooling class, material selection, and process controls. Factors that influence achievable tolerance include material shrinkage and anisotropy behavior, part geometry, wall thickness uniformity, gate location, and cavity count. Process capability (Cpk) should be evaluated for critical dimensions during process validation. Specifying tolerances tighter than the process can hold in sustained production leads to sorting costs, scrap, or secondary operations.
What is the difference between verification and validation testing?
Verification testing confirms that the device meets its specified design requirements. It answers the question: does the device perform to the engineering specifications? Validation testing confirms that the device is fit for its intended use under actual or simulated clinical conditions. It answers the question: does the device satisfy user needs and work safely and effectively for the patient? Both are required for FDA regulatory submissions, and both should be performed on production-representative parts to ensure the test results are predictive of commercial device performance.
How early should I involve a contract manufacturer in device development?
Earlier than most teams default to. The conventional approach of completing design, then engaging a manufacturer for DFM review, builds rework into the timeline. Involving a manufacturing partner during the design phase allows DFM considerations, material processing input, tolerance capability data, and supply-chain constraints to influence the design while changes are still inexpensive. This is especially valuable for injection-molded and extruded components, where process-specific factors like weld line location, mold flow behavior, and die design constraints directly impact part performance. Aptyx’s engineering model is specifically built to support early engagement, with dedicated project engineers, Moldflow simulation, and Q-Drive quick-turn tooling available during the development phase.
